Due to the amount of emails I recieve regarding some of my photos, I thought that I would start a new series of posts to share some photography tips and tricks for any budding photographers out there!
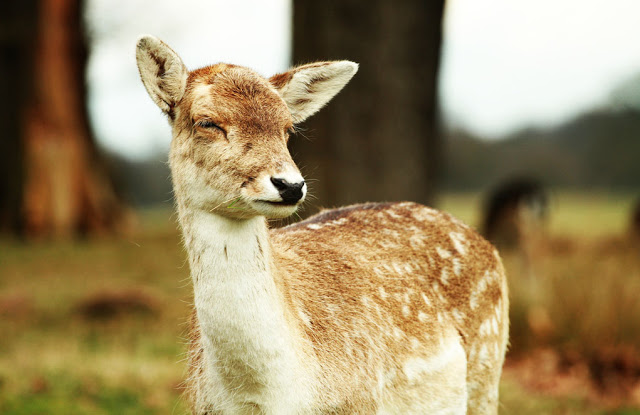
The first ‘tutorial’ will be based on aperture and depth of field. Now, you may have seen loads of photos in which the background looks ‘fuzzy’ and the main subject in sharp view. This technique is called a depth of field and the effect of the photo depends on how shallow or deep the depth of field is. Here are some examples of some previous photos featuring the depth of field.
 |
| 400 ISO – f/4 |
 |
| 200 ISO f/1.8 |
In a nutshell, the aperture determines how much of your image will appear sharp. Choose a large aperture and only a small amount of the image will be sharp. Choose a small aperture and you’ll make everything look sharp, front to back.
 |
| A photo with a small aperture. |
 |
| Same photo with a large aperture. |
To kick off and get to grips with apertures, let’s first look at the sequence of aperture values: 32, 22, 16, 11, 8, 5.6, 4, 2.8, 2, 1.4. Each aperture value in this sequence is called a ‘stop’ which means that f/8 allows half as much light in as f/5.6.
f/1.4 is the largest aperture here, f/32 is the smallest.
How to control the aperture lens
Apertures help control the amount of light that reaches the sensor in your DSLR to produce the correct exposure. Stick your camera on program (P) or full auto mode and you’ll get a decent result, but the camera is making all the decisions for you and it simply won’t know what you want from your picture creatively.
Fortunately, most if not all DSLRs also offer an aperture-priority mode marked on the exposure mode dial as AV (Aperture Value) or, simply A. If you adjust the aperture in this mode, the camera will automatically adjust the shutter speed to give you a correct exposure while the selected aperture value remains fixed. If you’re new to this, the aperture priority mode (AV) is the perfect place to begin!
You can also control it in the manual (M) exposure mode, but in this mode you must also select the shutter speed to match. A display in the viewfinder, the camera’s top-plate LCD or rear LCD screen will help you find the right exposure.
I hope everything i’ve written above makes sense! “/
If you have any questions on this specific technique, please feel free to comment below.
Hope this helps!
LOVE!!
Ooo I can't wait to read the posts to come on photography. Your photos are great, I need to learn from you!
oooh how I wish I had a SLR! As soon as I get one I will be reading these posts in proper detail to get tips! In the meantime, could you recommend a decent DSRL for a beginner…not too expensive but will give me good shots (true colour and better focus).
Wow, you really gave a great explanation. Thanks for this. Ill def be using it. I always wondered how people did that haha.
Sophia
http://lasophialasophia.blogspot.com
Thanks girls!
@ Cherry Lane, I would recommend the Canon 1100D as a GREAT intro cam. loads of Megapixels, a really decent lans and not too expensive!